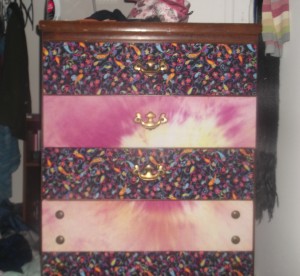
Well ladies and gentlemen if you have children you know something nice can turn into something drastic within hours! My daughter, now 14, has a dresser which was used when we got it. Well…it needed a face-lift, bad! So, as I was strolling through Pinterest one day I saw a post http://www.betterafter.net/2010/08/venti-dresser.html and so I tried it! You simply cover your old dresser with material!
 Here’s what mine looks like!!!!!
It was so easy! It did take some time to do it but it really made her old dresser look A LOT better and within my budget.
All I used was some leftover material, you will need about a yard or two total depending on how large or small your dresser. Modge Podge, yes ladies and gentlemen I broke and bought it but I am so glad I did! It truly was the perfect glue for this project. Something to apply the modge podge, I used a paintbrush. A screwdriver and your dresser!
First I emptied the dresser of course. Then I cut my material leaving an inch extra on every side. Take off your knobs and apply Modge Podge to the entire area. lay your material down and smooth it from the center out. Modge podge the ends around the side and back of the drawer leaving no loose ends…you don’t want them to get caught and rip off! I then felt around for the holes and used my screwdriver to poke through the material over the holes so I could get the screw and knob back through. Do that for all the drawers and it looks great! My daughter loves her new dresser and it didn’t have to hurt my budget!